How to Add Clerk Authentication in Next.js 16 (2026 Guide)
Introduction
Authentication is one of the most important parts of modern web applications. Whether you're building a SaaS product, admin dashboard, marketplace, or social platform, you need a secure way to manage users, sessions, and protected routes.
In this guide, you'll learn how to add authentication to your Next.js 16 app using Clerk. We’ll cover:
- Setting up Clerk in Next.js 16
- Creating sign-in and sign-up pages
- Protecting private routes
- Accessing authenticated users in server components
- Protecting server actions
- Adding social login
- Understanding route groups and dynamic routes
By the end, you’ll have a complete authentication system running in your app.
Why Use Clerk for Authentication?
Building authentication from scratch is time-consuming and error-prone. You need to handle:
- Password hashing
- Sessions
- Social login
- Email verification
- Security best practices
- Protected routes
- User management
Instead of reinventing all of this, Clerk provides a production-ready authentication system with prebuilt UI components and secure session handling.
Key Features of Clerk
- Prebuilt authentication UI
- User management dashboard
- Social login providers
- Session management
- Route protection
- Server-side authentication helpers
- Easy integration with Next.js
Clerk works extremely well with the App Router in Next.js 16 and makes authentication much simpler.
What You’ll Build
In this tutorial, we’ll create:
- Sign-in page
- Sign-up page
- Protected private routes
- Navbar with auth state
- Server-side user authentication
- GitHub OAuth login
Prerequisites
Before starting, make sure you have:
- Node.js installed
- Basic knowledge of React and Next.js
- A Clerk account
Create a Next.js Project
Create a new Next.js app using:
npx create-next-app@latest clerk-auth
Choose the options according to your preferences.
For this tutorial, we’re using:
- TypeScript
- Tailwind CSS
- React Compiler
src/directory
Install Clerk
Install Clerk in your project:
npm install @clerk/nextjs
Project Folder Structure
Your project structure will look like this:
root/
    .env.local

src/
  proxy.ts

  app/
    layout.tsx
    globals.css

    (private)/
      layout.tsx
      page.tsx

    (public)/
      layout.tsx

        sign-in/[[...sign-in]]/
          page.tsx

        sign-up/[[...sign-up]]/
          page.tsx

  components/
    navbar.tsx
Add Clerk Middleware
Create a proxy.ts file.
If you’re using the src directory, place it inside src/proxy.ts.
src/proxy.ts
import { clerkMiddleware } from '@clerk/nextjs/server'

export default clerkMiddleware();

export const config = {
  matcher: [
    // Skip Next.js internals and static files
    '/((?!_next|[^?]*\\.(?:html?|css|js(?!on)|jpe?g|webp|png|gif|svg|ttf|woff2?|ico|csv|docx?|xlsx?|zip|webmanifest)).*)',

    // Always run for API routes
    '/(api|trpc)(.*)',

    // Clerk frontend API routes
    '/__clerk/(.*)',
  ],
}
What Does This Middleware Do?
The Clerk middleware:
- Handles authentication sessions
- Detects signed-in users
- Protects routes
- Works with both client and server components
The matcher ensures middleware runs only where necessary.
Wrap Your App with ClerkProvider
Now wrap your application with ClerkProvider.
src/app/layout.tsx
import { ClerkProvider } from '@clerk/nextjs'

export default function RootLayout({
  children,
}: {
  children: React.ReactNode
}) {
  return (
    <html lang="en">
      <body className="min-h-full flex flex-col">
        <ClerkProvider>
          {children}
        </ClerkProvider>
      </body>
    </html>
  )
}
Why Use ClerkProvider?
ClerkProvider gives your entire application access to:
- Authentication state
- User sessions
- Clerk UI components
- Server helpers
Without it, Clerk components won’t work.
Create a Navbar Component
Now let’s create a navigation bar that changes depending on whether the user is logged in.
src/components/navbar.tsx
import {
  Show,
  SignInButton,
  SignUpButton,
  UserButton,
} from '@clerk/nextjs'

const Navbar = () => {
  return (
    <header className="flex justify-end items-center p-4 gap-4 h-16 shadow-md">
      <Show when="signed-out">
        <SignInButton />

        <SignUpButton>
          <button className="bg-[#6c47ff] text-white rounded-full font-medium text-sm sm:text-base h-10 sm:h-12 px-4 sm:px-5 cursor-pointer">
            Sign Up
          </button>
        </SignUpButton>
      </Show>

      <Show when="signed-in">
        <UserButton />
      </Show>
    </header>
  )
}

export default Navbar
Understanding the Clerk Components
Show
The Show component conditionally renders content based on authentication state.
<Show when="signed-in">
or
<Show when="signed-out">
SignInButton
Opens the Clerk sign-in flow.
SignUpButton
Opens the Clerk sign-up flow.
UserButton
Displays the authenticated user avatar and account menu.
Clerk has a lots of built in UI components that’s already do the heavy lifting, learn more Clerk’s UI Components.
Add Navbar to Root Layout
Update your root layout:
src/app/layout.tsx
import { ClerkProvider } from '@clerk/nextjs'
import Navbar from '@/components/navbar'

export default function RootLayout({
  children,
}: {
  children: React.ReactNode
}) {
  return (
    <html lang="en">
      <body>
        <ClerkProvider>
          <Navbar />
          {children}
        </ClerkProvider>
      </body>
    </html>
  )
}
Start the Development Server
Run:
npm run dev
You’ll see a Clerk popup in the bottom-left corner.
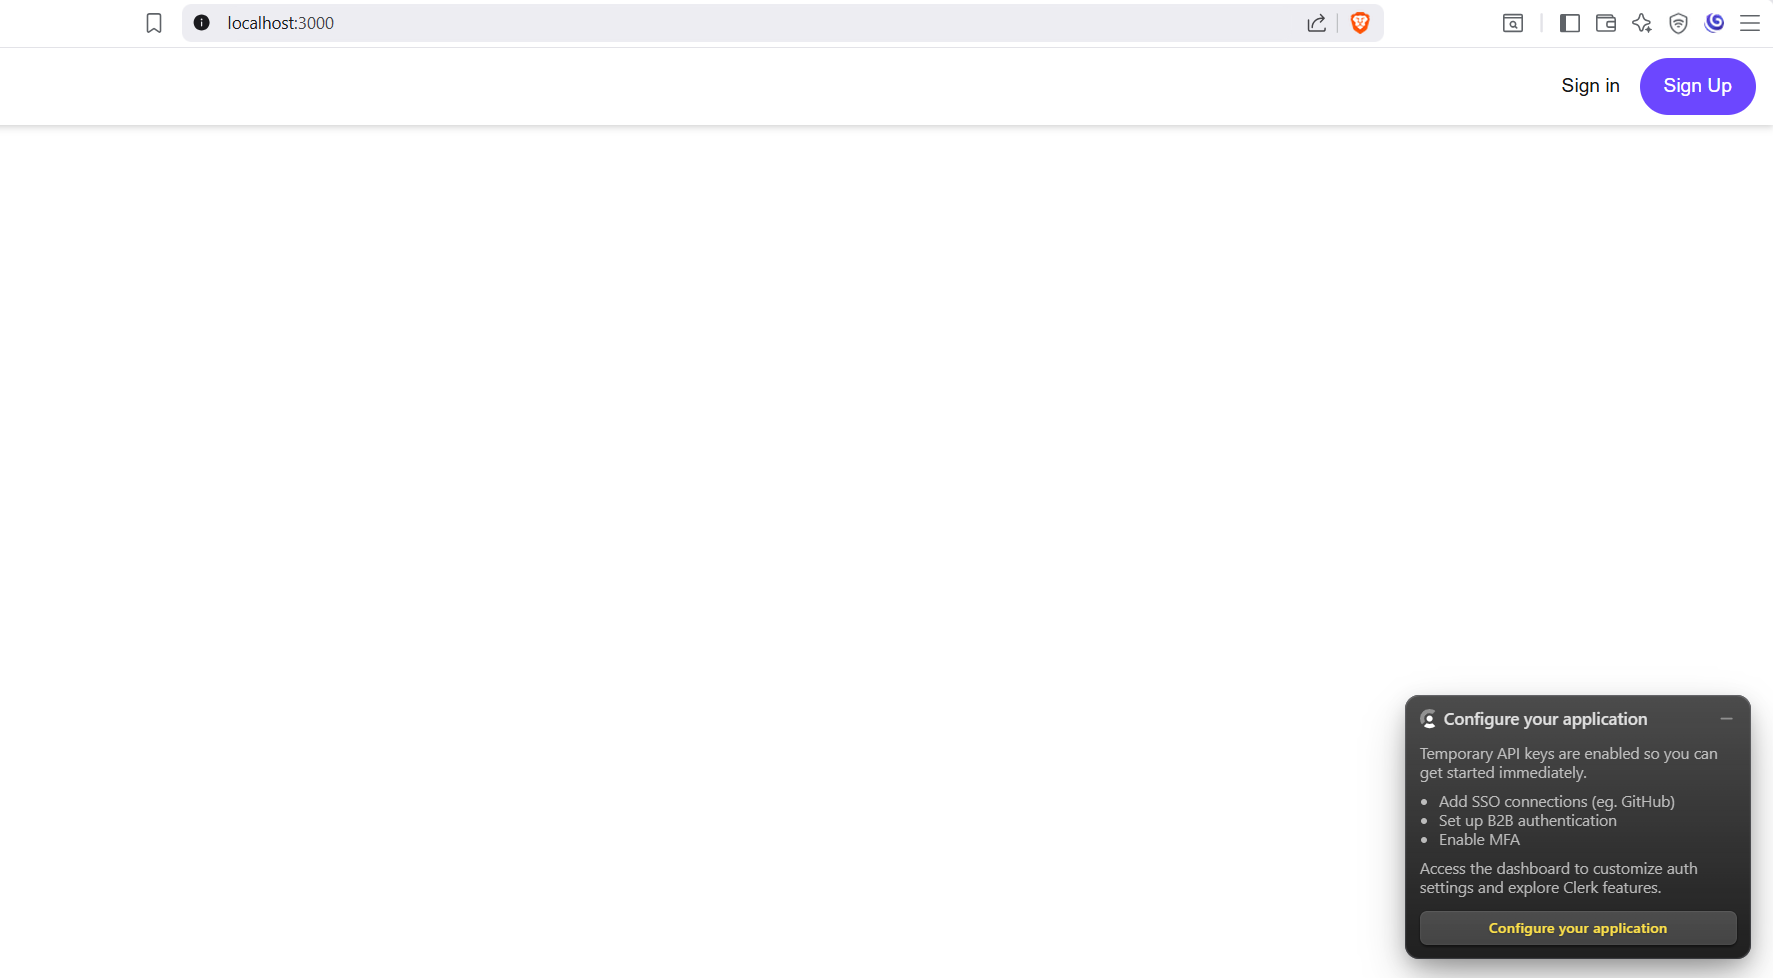
Click:
Configure your application
You’ll be redirected to the Clerk dashboard.
Create a Clerk Application
After logging into Clerk:
- Enter your application name
- Create the application
- Copy your environment variables
Add Environment Variables
Create a .env.local file.
.env.local
NEXT_PUBLIC_CLERK_PUBLISHABLE_KEY=pk_test_****
CLERK_SECRET_KEY=***
After adding them, restart your development server.
Create a Custom Sign-In Page
Now let’s create our own sign-in route.
src/app/(public)/sign-in/[[...sign-in]]/page.tsx
import { SignIn } from '@clerk/nextjs'

const Login = () => {
  return <SignIn />
}

export default Login
Understanding the Route Structure
Route Groups
(public)
This is a Route Group in Next.js.
Route groups help organize routes without affecting the URL.
Learn more about Nextjs Route Groups.
Dynamic Catch-All Routes
[[...sign-in]]
This is a dynamic catch-all route.
It allows Clerk to handle multiple auth-related routes internally.
Learn more about Nextjs Dynamic Routes.
Create a Custom Sign-Up Page
src/app/sign-up/[[...sign-up]]/page.tsx
import { SignUp } from '@clerk/nextjs'

export default function Page() {
  return <SignUp />
}
Redirect Clerk Buttons to Custom Pages
Right now, the buttons still redirect to Clerk-hosted pages.
To fix this, update .env.local.
.env.local
NEXT_PUBLIC_CLERK_SIGN_IN_URL=/sign-in
NEXT_PUBLIC_CLERK_SIGN_UP_URL=/sign-up
Now the buttons will redirect to your custom routes.
Learn more about these environment variables and how to customize Clerk's redirect behavior in this dedicated clerk redirect guide.
Render User Information in a Server Component
Now let’s display the logged-in user’s name.
Move your homepage into a private route group:
app/(private)/page.tsx
And add
import { currentUser } from '@clerk/nextjs/server'

const Home = async () => {
  const user = await currentUser()

  return (
    <div className='mt-3 text-2xl'>
      Welcome {user?.fullName}
    </div>
  )
}

export default Home
Why Use currentUser()?
currentUser() works inside Server Components and allows you to securely access authenticated user data.
This is one of the best parts of using Clerk with Next.js App Router.
Protect Private Routes
Right now, unauthenticated users can still access your pages.
Let’s fix that.
Update your proxy.ts.
src/proxy.ts
import {
  clerkMiddleware,
  createRouteMatcher,
} from '@clerk/nextjs/server'

const isPublicRoute = createRouteMatcher([
  '/sign-in(.*)',
  '/sign-up(.*)',
])

export default clerkMiddleware(async (auth, req) => {
  if (!isPublicRoute(req)) {
    await auth.protect()
  }
})

export const config = {
  matcher: [
    '/((?!_next|[^?]*\\.(?:html?|css|js(?!on)|jpe?g|webp|png|gif|svg|ttf|woff2?|ico|csv|docx?|xlsx?|zip|webmanifest)).*)',
    '/(api|trpc)(.*)',
    '/__clerk/(.*)',
  ],
}
How Route Protection Works
We created a public route matcher:
const isPublicRoute = createRouteMatcher([
  '/sign-in(.*)',
  '/sign-up(.*)',
])
Everything except those routes becomes protected.
await auth.protect()
If the user is not authenticated, Clerk automatically redirects them to the sign-in page.
Protect Server Actions
You can also secure server actions using Clerk’s auth() helper.
dummy-server-action.ts
'use server'

import { auth } from '@clerk/nextjs/server'

export const dummyAction = async () => {
  // Check if user is authenticated
  const { isAuthenticated } = await auth()

  if (!isAuthenticated) {
    return {
      error: 'Please login',
    }
  }

  // Database logic here
}
Why Protect Server Actions?
Even if your UI is protected, server actions should still verify authentication because users can manually send requests.
This adds an additional security layer.
Add GitHub Authentication
Clerk also supports social authentication providers like:
- GitHub
- Discord
- Microsoft
- Apple
Let’s enable GitHub login.
Enable GitHub Login in Clerk
Go to your Clerk dashboard:
- Select your application
- Open the Configure tab
- Click SSO Connections
- Click Add Connection
- Select GitHub
- Enable:
- Sign-in
- Sign-up
- Save the connection
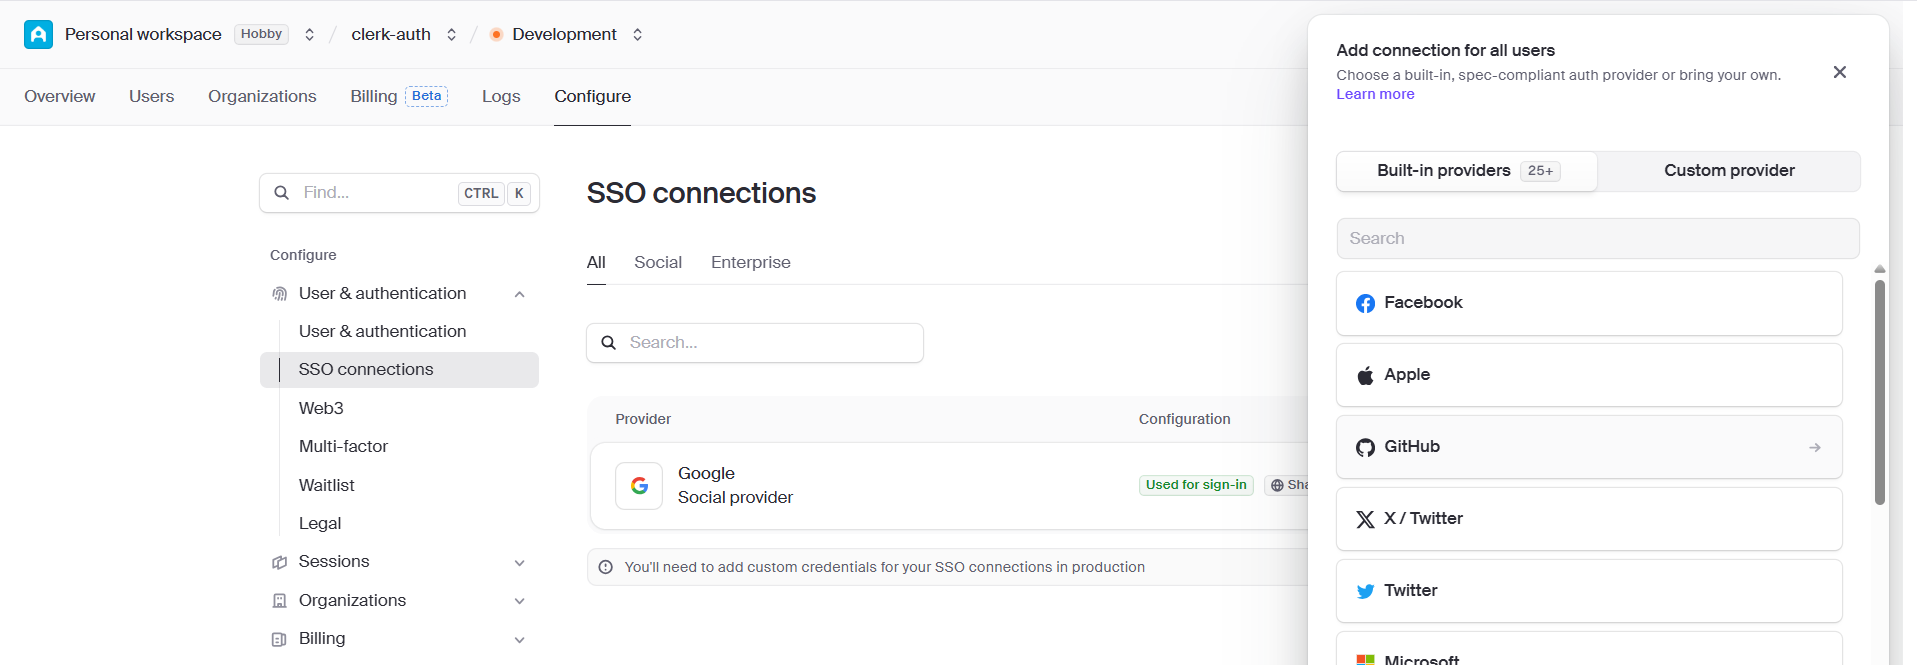
Now users can authenticate using GitHub.
Important Production Note
When deploying to production, you should also enable:
Use Custom Credentials
This requires configuring your own GitHub OAuth credentials.
Follow this clerk doc on How to setup Github Custom Credentials.
Tip
If the built-in Clerk UI components don’t fully match your design requirements, you can create fully custom authentication flows using Clerk APIs. For more information, see the custom flow guide.
Common Mistakes to Avoid
Forgetting ClerkProvider
Without ClerkProvider, Clerk components won’t work.
Incorrect Middleware Location
If using src/, place middleware inside:
src/proxy.ts
Missing Environment Variables
Always restart your development server after changing .env.local.
Not Protecting Server Actions
Client-side protection alone is not enough.
Always validate authentication on the server.
Final Thoughts
You now have a complete authentication system in your Next.js 16 application using Clerk.
You learned how to:
- Install Clerk
- Create sign-in and sign-up pages
- Protect routes
- Access users in server components
- Secure server actions
- Add GitHub authentication
Clerk removes a huge amount of complexity from authentication and integrates extremely well with modern Next.js applications.
If you're building production-grade applications, Clerk is one of the fastest and safest ways to add authentication.
Next Steps
- Add Stripe Subscription
- Add Stripe Billing
- Add Database with Supabase
- Add Transactional Emails with Resend