How to Integrate Stripe Checkout with Next.js 16 (2026 Edition)
If you're building a SaaS product with Next.js, one of the fastest and most reliable ways to accept payments is by using Stripe Checkout.
In this guide, you'll learn how to integrate Stripe Checkout with Next.js 16 using:
- App Router
- Server Actions
- TypeScript
- Stripe Webhooks
- Hosted Checkout Pages
By the end, you'll have a fully working Stripe payment flow with webhook handling and order verification.
What We’re Building
In this tutorial, we’ll build a simple SaaS pricing flow where users can purchase one of two packages:
- Harmony
- Legacy
When a user clicks a checkout button:
- A Stripe Checkout Session will be created
- The user will be redirected to Stripe’s hosted checkout page
- After payment, Stripe redirects the user back to your website
- Stripe sends a webhook event to your Next.js application
- Your app verifies the payment and creates an order
This guide focuses mainly on Stripe + Next.js integration rather than UI design.
Two Ways to Integrate Stripe Checkout
1. Hosted Stripe Checkout
In this method:
- Users are redirected to a secure checkout page hosted by Stripe
- Stripe handles payment security and PCI compliance
- After payment, users are redirected back to your website
This is the easiest and safest option for most SaaS applications.
2. Embedded Stripe Checkout
In this approach:
- Stripe Checkout is embedded directly inside your website
- You can customize the UI more deeply
- No external redirect is required
This guide focuses on the hosted checkout approach but I've full guide covering this second method please visit How to Integrate Stripe Payment Element with Nextjs 16
Create a Next.js 16 Project
Create a new Next.js application:
npx create-next-app@latest myapp
Choose the options that fit your setup.
Recommended:
- TypeScript
- App Router
src/directory- React Compiler
Install Stripe
Install the official Stripe SDK:
npm install stripe
Configure Stripe Server SDK
Create the following file:
src/lib/stripe/server.ts
Add this code:
import Stripe from 'stripe';

export const stripe = new Stripe(
  process.env.STRIPE_SECRET_KEY!,
  {
    apiVersion: '2026-04-22.dahlia'
  }
);
This initializes the Stripe SDK using your secret API key.
Get Your Stripe API Keys
Go to:
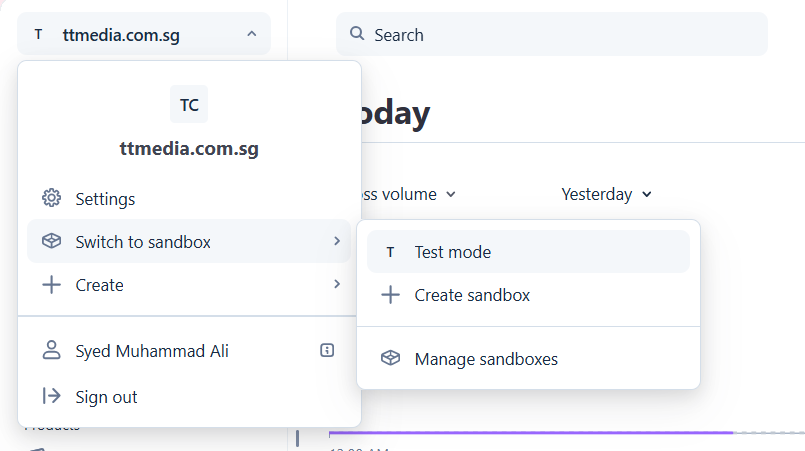
Enable Test Mode from the dashboard.
Copy your:
sk_test_...secret keypk_test_...publishable key
Configure Environment Variables
Create a .env.local file in your project root:
STRIPE_SECRET_KEY=sk_test_****
NEXT_PUBLIC_STRIPE_PUBLISHABLE_KEY=pk_test_****
NEXT_PUBLIC_APP_URL=http://localhost:3000
Important Notes
STRIPE_SECRET_KEYshould only be used on the serverNEXT_PUBLIC_variables are exposed to the client- Always switch to live keys before production deployment
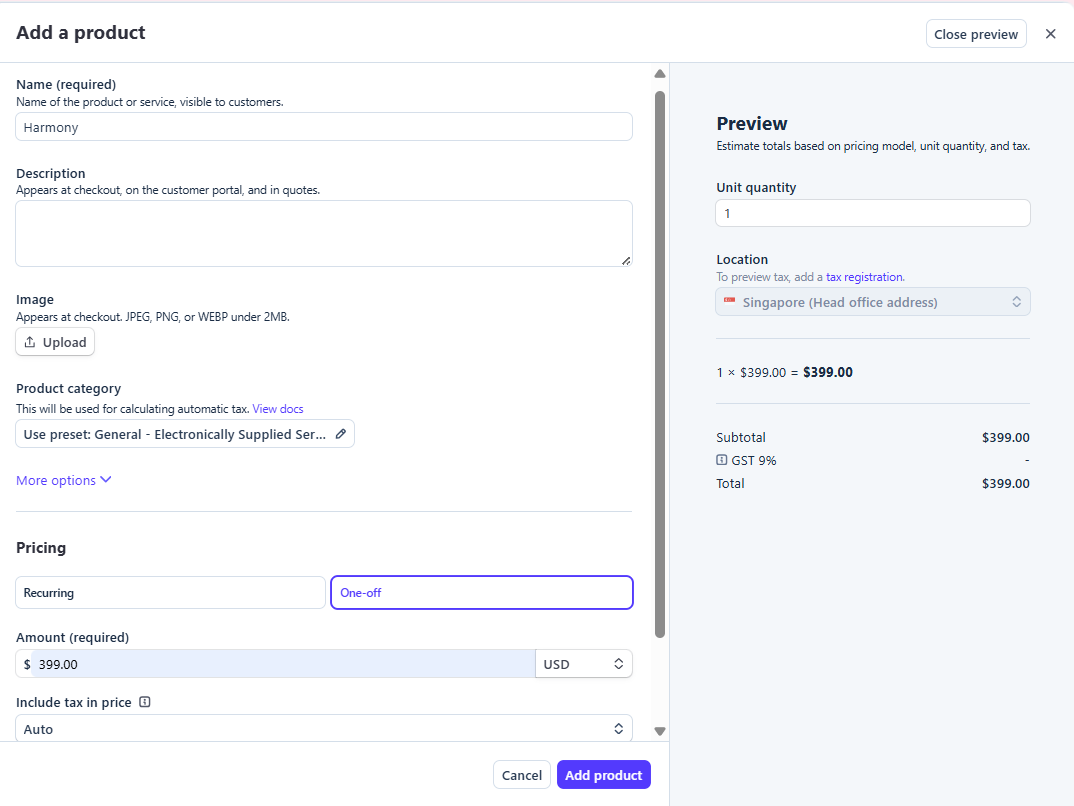
Create Products in Stripe
Inside the Stripe dashboard:
- Go to Product Catalog
- Click Create Product
- Enter:
- Product name
- Pricing
- Currency
- Billing type
If users pay once:
- Select One-off
If users subscribe monthly/yearly:
- Select Recurring
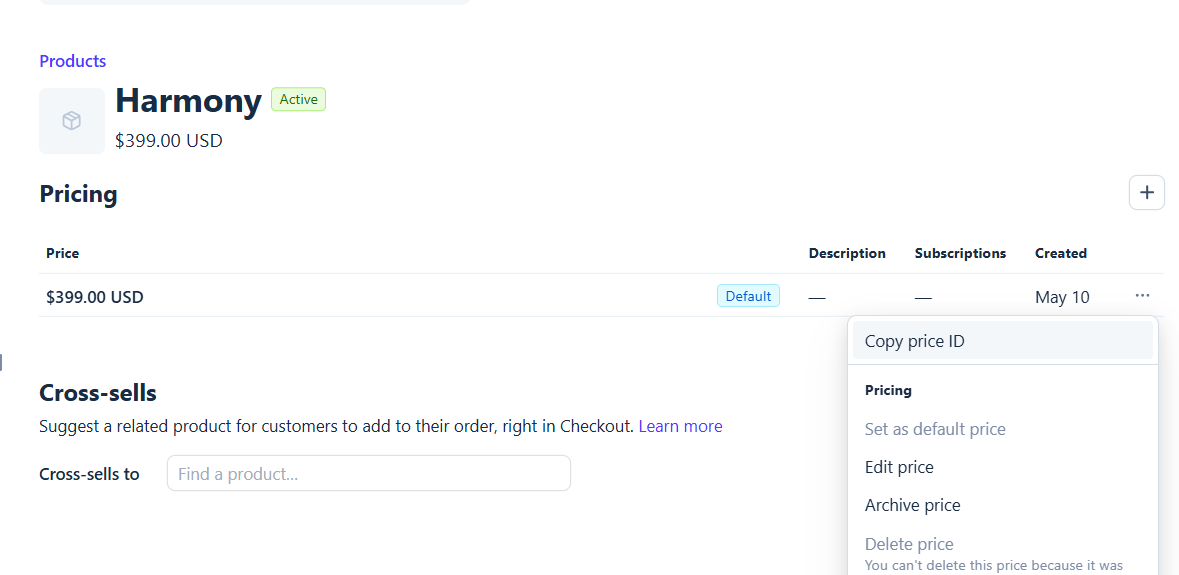
Copy Stripe Price IDs
After creating products:
- Open the product
- Click the three-dot menu
- Click Copy Price ID
Add them to .env.local:
NEXT_PUBLIC_STRIPE_HARMONY_PRICE_ID=price_xxx
NEXT_PUBLIC_STRIPE_LEGACY_PRICE_ID=price_xxx
Create Package Constants
Create:
src/lib/constants/package-tier.ts
Add:
export const PKG_TIER = {
  HARMONY: 'harmony',
  LEGACY: 'legacy'
} as const;

export const PACKAGES = {
  harmony: {
    id: 'harmony',
    name: 'Harmony',
    description: 'The complete memorial song',
    price: 399,
    turnaroundHours: 72,
    maxRevisions: 2,
    stripePriceId: process.env.NEXT_PUBLIC_STRIPE_HARMONY_PRICE_ID!,
    features: [
      'Custom AI-generated memorial song',
      'Two rounds of lyric revisions',
      'Single-photo video with scrolling lyrics',
      'Social media versions'
    ]
  },

  legacy: {
    id: 'legacy',
    name: 'Legacy',
    description: 'Their full story, beautifully told',
    price: 599,
    turnaroundHours: 96,
    maxRevisions: 3,
    stripePriceId: process.env.NEXT_PUBLIC_STRIPE_LEGACY_PRICE_ID!,
    features: [
      'Everything in Harmony',
      'Multi-photo slideshow video',
      'Video revisions',
      'Social media versions'
    ]
  }
};

export type PkgTierType = keyof typeof PACKAGES;
Why Use Constants Instead of Hardcoded Strings?
Avoid writing values like "harmony" everywhere in your app.
Using constants:
- reduces bugs
- improves autocomplete
- makes refactoring easier
- keeps your app scalable
Create a Server Action
Create:
src/lib/actions/start-checkout.ts
Add:
"use server";

export async function startCheckout() {

}
What Are Server Actions?
Server Actions are asynchronous functions executed on the server in Next.js.
They are commonly used for:
- form submissions
- database mutations
- payment processing
- secure backend logic
Official docs: https://nextjs.org/docs/app/building-your-application/data-fetching/server-actions-and-mutations
Create Package UI
Create:
src/components/package-list.tsx
Add:
'use client';

import { useActionState } from "react";
import { startCheckout } from "@/lib/actions/start-checkout";
import { PACKAGES } from "@/lib/constants/package-tier";

export default function PackageList() {
  const [state, action, isPending] = useActionState(
    startCheckout,
    { error: '' }
  );

  return (
    <div>
      <form action={action}>
        {Object.values(PACKAGES).map(pkg => (
          <button
            key={pkg.id}
            type="submit"
            name="packageTier"
            value={pkg.id}
            disabled={isPending}
            className="border border-gray-300 p-3 disabled:opacity-50"
          >
            {isPending ? 'Redirecting...' : pkg.name}
          </button>
        ))}
      </form>

      {state?.error && (
        <div className="text-red-500">
          {state.error}
        </div>
      )}
    </div>
  );
}
Understanding useActionState
useActionState():
- connects forms with Server Actions
- manages loading state
- handles server responses
It accepts:
- your action function
- initial state
And returns:
- current state
- form action
- pending state
Render Packages on Home Page
Update your homepage:
import PackageList from "@/components/package-list";

export default function Page() {
  return <PackageList />;
}
Create Stripe Checkout Session
Now update:
src/lib/actions/start-checkout.ts
"use server";

import { redirect } from "next/navigation";
import { PACKAGES, PkgTierType } from "../constants/package-tier";
import { stripe } from "../stripe/server";

export async function startCheckout(
  prev: unknown,
  formData: FormData
) {
  try {
    const pkgTier = formData.get('packageTier') as PkgTierType;

    if (!pkgTier || !PACKAGES[pkgTier]) {
      return { error: 'Invalid package tier' };
    }

    const session = await stripe.checkout.sessions.create({
      mode: 'payment',

      line_items: [
        {
          price: PACKAGES[pkgTier].stripePriceId,
          quantity: 1
        }
      ],

      success_url:
        `${process.env.NEXT_PUBLIC_APP_URL}/checkout/success?session_id={CHECKOUT_SESSION_ID}`,

      cancel_url:
        `${process.env.NEXT_PUBLIC_APP_URL}/`,

      metadata: {
        packageTier: pkgTier
      },

      customer_creation: 'always',

      billing_address_collection: 'auto',

      phone_number_collection: {
        enabled: true
      }
    });

    if (!session.url) {
      throw new Error('Failed to create checkout session');
    }

    redirect(session.url);

  } catch (err) {
    return {
      error:
        err instanceof Error
          ? err.message
          : 'Failed to checkout'
    };
  }
}
Understanding the Checkout Session
mode
mode: 'payment'
Used for one-time payments.
For subscriptions use:
mode: 'subscription'
line_items
Defines what the user is purchasing.
success_url
Where Stripe redirects users after successful payment.
cancel_url
Where Stripe redirects users after cancellation.
metadata
Useful for attaching:
- package IDs
- user IDs
- internal references
customer_creation
Automatically creates Stripe customers.
Important Security Note
Never trust prices coming from the frontend.
Always:
- validate product IDs
- validate Stripe price IDs
- verify payments server-side
Create Stripe Webhook Route
Create:
src/app/api/webhook/route.ts
Configure Stripe Webhooks
Inside Stripe dashboard:
- Go to Developers
- Click Webhooks
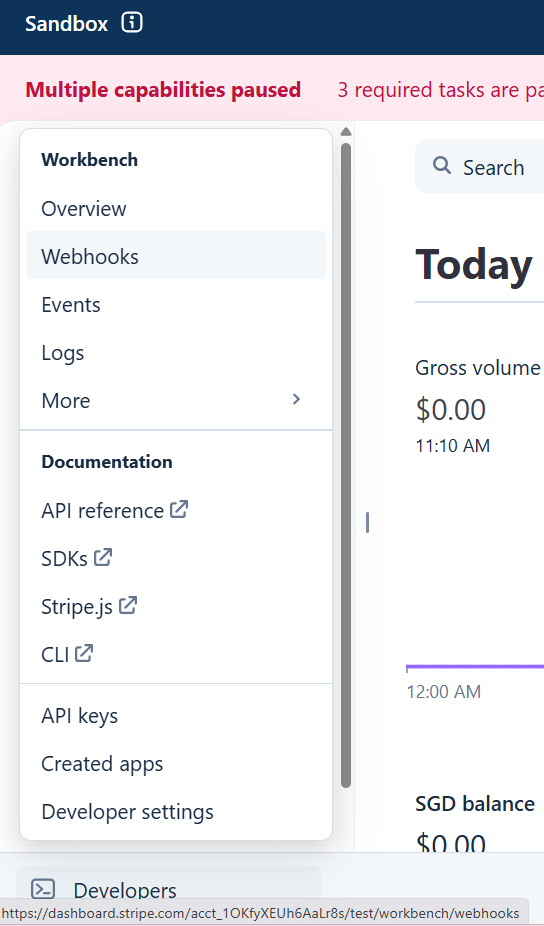
- Click Add Destination
- Enter:
https://yourdomain.com/api/webhook
- Select:
checkout.session.completed
- Copy the signing secret
Add to .env.local:
STRIPE_WEBHOOK_SECRET=whsec_xxx
Test Webhooks Locally
Install the Stripe CLI:
https://docs.stripe.com/stripe-cli
Run:
stripe listen --forward-to localhost:3000/api/webhook
Stripe will generate a webhook signing secret for local development.
Implement the Webhook Handler
Add:
import { PACKAGES } from "@/lib/constants/package-tier";
import { stripe } from "@/lib/stripe/server";
import { headers } from "next/headers";
import { NextResponse } from "next/server";
import Stripe from "stripe";

const endpointSecret =
  process.env.STRIPE_WEBHOOK_SECRET!;

export async function POST(req: Request) {
  try {
    const payload = await req.text();

    const sig =
      (await headers()).get('stripe-signature')!;

    let event: Stripe.Event;

    try {
      event = stripe.webhooks.constructEvent(
        payload,
        sig,
        endpointSecret
      );

    } catch (err) {
      const errorMessage =
        err instanceof Error
          ? err.message
          : 'Unknown error';

      return NextResponse.json(
        { message: `Webhook Error: ${errorMessage}` },
        { status: 400 }
      );
    }

    if (event.type === 'checkout.session.completed') {

      const session =
        event.data.object as Stripe.Checkout.Session;

      if (session.payment_status !== 'paid') {
        return NextResponse.json(
          { message: 'Payment not completed' },
          { status: 200 }
        );
      }

      const pkgTier =
        session.metadata?.packageTier;

      const customerDetails =
        session.customer_details;

      const customerEmail =
        customerDetails?.email;

      if (!pkgTier || !(pkgTier in PACKAGES)) {
        throw new Error('Invalid package tier');
      }

      if (!customerEmail) {
        throw new Error('Customer email required');
      }

      // Create database order here
      // Send confirmation email here
    }

    return NextResponse.json(
      { message: 'Received' },
      { status: 200 }
    );

  } catch (err) {

    const error =
      err instanceof Error
        ? err.message
        : 'Something went wrong';

    console.error(error);

    return NextResponse.json(
      { error },
      { status: 500 }
    );
  }
}
Why Use req.text()?
In Next.js App Router route handlers, we can safely use:
await req.text()
Unlike Pages Router, no additional body-parser configuration is required.
Prevent Duplicate Orders
Stripe automatically retries failed webhooks.
Always store:
- Stripe event IDs
- checkout session IDs
before processing orders.
This prevents:
- duplicate emails
- duplicate orders
- duplicate fulfillment
Subscription Webhook Events
This guide focuses on one-time payments.
If you're using subscriptions, also listen for:
invoice.paidcustomer.subscription.updatedcustomer.subscription.deleted
Test Your Checkout
Start your Next.js app:
npm run dev
Click one of your package buttons.
You should:
- Redirect to Stripe Checkout
- Complete payment
- Return to your website
- Receive webhook events successfully
Final Thoughts
You now have a fully working Stripe Checkout integration using:
- Next.js 16
- App Router
- Server Actions
- Stripe Webhooks
- TypeScript
This setup is scalable, production-friendly, and ideal for SaaS applications.
From here you can expand into:
- subscriptions
- invoices
- customer portals
- usage billing
- Stripe Connect
- embedded checkout
Useful Resources
- Stripe Documentation: https://docs.stripe.com
- Next.js Documentation: https://nextjs.org/docs
- Stripe Checkout Docs: https://docs.stripe.com/payments/checkout
Continue Learning
If you'd like to learn more about stripe, check out these tutorials: