How to Integrate Stripe Payment Element with Next.js 16 (2026 Edition)
Stripe Payment Element is one of the best ways to accept payments in modern web applications. It keeps sensitive card information on Stripe servers, helping reduce PCI (Payment Card Industry) compliance complexity.
In this beginner-friendly guide, you'll learn how to integrate Stripe Payment Element with Next.js 16 using:
- App Router
- Server Actions
- Payment Intents
- Stripe Webhooks
- TypeScript
By the end of this guide, you'll have a fully working checkout flow.
What We Are Building
In this tutorial, we'll create a simple SaaS pricing page with two packages:
| Package | Price |
|---|---|
| Harmony | $399 |
| Legacy | $599 |
When the user clicks a package:
- A Stripe Payment Intent will be created
- Stripe Payment Element will appear
- User enters payment details
- Payment is confirmed
- Stripe webhook handles payment success
This guide mainly focuses on the Stripe integration rather than UI design, so we will keep the UI simple.
Two Ways to Accept Payments in Stripe
Stripe provides two main checkout methods.
1. Stripe Hosted Checkout
Stripe hosts the entire checkout page.
User flow:
Your Website → Stripe Checkout → Back to Your Website
This method is easier to set up. I've full guide covering this method please visit How to Integrate Stripe Hosted Checkout with Nextjs 16 .
2. Stripe Payment Element (What We'll Use)
Stripe checkout form is embedded directly inside your website.
Benefits:
- Better UX
- Fully customizable
- No redirect before payment
Create a Next.js 16 Project
Run:
npx create-next-app@latest myapp
Choose your preferred setup.
Recommended:
- TypeScript
- App Router
- src directory
- React Compiler
Install Stripe Packages
Run:
npm install stripe @stripe/react-stripe-js @stripe/stripe-js
These packages help us:
| Package | Purpose |
|---|---|
| stripe | Server-side Stripe SDK |
| @stripe/react-stripe-js | React components for Stripe |
| @stripe/stripe-js | Loads Stripe in browser |
Stripe Setup
Create Stripe Server Instance
Create:
lib/stripe/server.ts
import Stripe from "stripe";

export const stripe = new Stripe(
  process.env.STRIPE_SECRET_KEY!,
  {
    apiVersion: "2026-04-22.dahlia",
  }
);
What Does This Do?
This creates a Stripe instance on the server side.
We'll use this object to:
- Create Payment Intents
- Handle webhooks
- Access Stripe APIs securely
Create Stripe Client Instance
Create:
lib/stripe/client.ts
import { loadStripe } from "@stripe/stripe-js";

export const stripePromise = loadStripe(
  process.env.NEXT_PUBLIC_STRIPE_PUBLISHABLE_KEY!
);
Why Do We Need This?
Stripe Payment Element runs in the browser.
This file loads Stripe safely on the client side.
Get Stripe API Keys
Go to the Stripe Dashboard:
- Open the sidebar
- Enable Test Mode
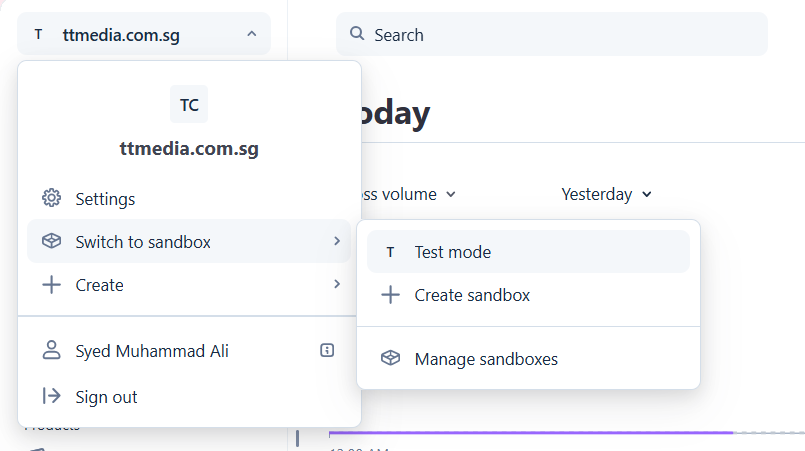
This gives you test keys instead of live keys.
You should use:
sk_test_pk_test_
while developing locally.
Create Environment Variables
Create:
.env.local
STRIPE_SECRET_KEY=sk_test_xxx
NEXT_PUBLIC_STRIPE_PUBLISHABLE_KEY=pk_test_xxx
NEXT_PUBLIC_APP_URL=http://localhost:3000
Understanding Environment Variables
Why NEXT_PUBLIC_?
Variables that start with NEXT_PUBLIC_ can be accessed on the client side.
This is safe for publishable Stripe keys.
Important:
Never expose your Stripe Secret Key to the client side.
Create Package Constants
Create:
lib/constants/package-tier.ts
export const PKG_TIER = {
  HARMONY: "harmony",
  LEGACY: "legacy",
} as const;

export const PACKAGES = {
  harmony: {
    id: "harmony",
    name: "Harmony",
    price: 399,
  },

  legacy: {
    id: "legacy",
    name: "Legacy",
    price: 599,
  },
};

export type PkgTierType = keyof typeof PACKAGES;
Why Store Package Data in One File?
This is a very important practice.
Instead of hardcoding package names and prices everywhere in your app, we keep everything in one place.
Benefits:
- Easier maintenance
- Easier updates
- Less bugs
- Better scalability
For example:
If later you rename:
Harmony → Premium
You only update one file.
Create Checkout Form
Create:
src/components/checkout-form.tsx
"use client";

import {
  PaymentElement,
  useElements,
  useStripe,
} from "@stripe/react-stripe-js";

import { useState, SubmitEvent } from "react";

export function CheckoutForm() {
  const stripe = useStripe();
  const elements = useElements();

  const [loading, setLoading] = useState(false);
  const [error, setError] = useState<string | null>(null);

  const handleSubmit = async (e: SubmitEvent<HTMLFormElement>) => {
    e.preventDefault();

    if (!stripe || !elements) return;

    setLoading(true);
    setError(null);

    const result = await stripe.confirmPayment({
      elements,
      confirmParams: {
        return_url:
          `${process.env.NEXT_PUBLIC_APP_URL}/checkout/success`,
      },
      redirect: "always",
    });

    if (result.error) {
      setError(result.error.message || "Payment failed");
      setLoading(false);
      return;
    }

    setLoading(false);
  };

  return (
    <form
      onSubmit={handleSubmit}
      className="space-y-4"
    >
      <PaymentElement />

      {error && (
        <div className="text-red-500 text-sm">
          {error}
        </div>
      )}

      <button
        type="submit"
        disabled={!stripe || loading}
        className="w-full rounded-md bg-black px-4 py-3 text-white disabled:opacity-50"
      >
        {loading ? "Processing..." : "Pay Now"}
      </button>
    </form>
  );
}
Understanding the Checkout Form
What is PaymentElement?
PaymentElement is Stripe's prebuilt checkout UI.
It automatically supports:
- Cards
- Apple Pay
- Google Pay
- Bank payments
- Many regional payment methods
depending on your Stripe settings.
Important: Some methods may not work in development mode.
What Happens on Form Submit?
When the user clicks the Pay button:
stripe.confirmPayment()
Stripe:
- Validates card details
- Processes payment
- Handles authentication
- Redirects user after success
Why Use return_url?
After payment, Stripe redirects the user to your payment success page.
Example:
/checkout/success
Create Stripe Provider
Create:
src/components/stripe-provider.tsx
import { Elements } from "@stripe/react-stripe-js";
import { stripePromise } from "@/lib/stripe/client";
import { ReactNode } from "react";

interface Props {
  children: ReactNode;
  clientSecret: string;
}

export function StripeProvider({
  children,
  clientSecret,
}: Props) {
  return (
    <Elements
      stripe={stripePromise}
      options={{
        clientSecret,
        appearance: {
          theme: "night",
        },
      }}
    >
      {children}
    </Elements>
  );
}
Customizing Stripe Appearance
You can customize:
- Theme
- Colors
- Fonts
- Border radius
- Input styles
using the appearance object.
For more appearance options please visit Stripe Appearance API Docs
Create Payment Intent Server Action
Create:
lib/actions/create-payment-intent.ts
"use server";

export async function createPaymentIntent() {}
What Are Server Actions?
Before creating the payment intent, let's quickly understand Server Actions.
Server Actions are asynchronous functions that run on the server.
They help us:
- Handle forms
- Access databases
- Call APIs securely
- Mutate data
without creating traditional API routes.
Create Package List Component
Create:
src/components/package-list.tsx
"use client";

import { useActionState } from "react";

import { CheckoutForm } from "@/components/checkout-form";
import { StripeProvider } from "@/components/stripe-provider";

import { createPaymentIntent } from "@/lib/actions/create-payment-intent";

import { PACKAGES } from "@/lib/constants/package-tier";

export default function PackageList() {
  const [state, action, isPending] = useActionState(createPaymentIntent, { clientSecret: "", error: "" });

  return (
    <div>
      <form action={action}>
        {Object.values(PACKAGES).map(
          (pkg) => (
            <button
              key={pkg.id}
              type="submit"
              name="packageTier"
              value={pkg.id}
              disabled={
                isPending ||
                !!state?.clientSecret
              }
            >
              {pkg.name}
            </button>
          )
        )}
      </form>

      {state?.error && (
        <div>{state.error}</div>
      )}

      {state?.clientSecret && (
        <StripeProvider
          clientSecret={
            state.clientSecret
          }
        >
          <CheckoutForm />
        </StripeProvider>
      )}
    </div>
  );
}
Important: The name attribute is very important inside form on button element. Later we’ll access value from form data in our server action using this name attribute.
Understanding useActionState
useActionState():
- connects forms with Server Actions
- manages loading state
- handles server responses
It accepts:
- your action function
- initial state
And returns:
- current state
- form action
- pending state
Why Use "use client"?
Hooks only work in client components.
Since we're using:
useActionState()
we must add:
"use client"
Add Component to Homepage
import PackageList from "@/components/package-list";

export default function Page() {
  return <PackageList />;
}
Update Server Action
Now let's add the actual logic.
"use server";

import { stripe } from "@/lib/stripe/server";

import {
  PACKAGES,
  PkgTierType,
} from "../constants/package-tier";

export async function createPaymentIntent(
  prev: unknown,
  formData: FormData
): Promise<{
  clientSecret?: string;
  error?: string;
}> {
  try {
    const pkgTier =
      formData.get("packageTier");

    if (
      typeof pkgTier !== "string" ||
      !(pkgTier in PACKAGES)
    ) {
      return {
        error: "Invalid package tier",
      };
    }

    const pkg =
      PACKAGES[pkgTier as PkgTierType];

    const paymentIntent =
      await stripe.paymentIntents.create({
        amount: pkg.price * 100,

        currency: "usd",

        automatic_payment_methods: {
          enabled: true,
        },

        metadata: {
          packageTier: pkgTier,
        },
      });

    if (!paymentIntent.client_secret) {
      return {
        error:
          "Failed to create payment intent",
      };
    }

    return {
      clientSecret:
        paymentIntent.client_secret,
    };
  } catch (err) {
    return {
      error:
        err instanceof Error
          ? err.message
          : "Something went wrong",
    };
  }
}
Now let’s understand this action:
Firstly it has two parameters prev we’re not using this, our default state this paramater is provided by useActionState and second formData this paramater is provided by form element.
Now we’ll use that same name attribute packageTier we provided inside form element to get the package that user has clicked on. After validation we’ll create stripe payment intent now let’s understand stripe object.
Understanding Payment Intents
A Payment Intent represents a payment session in Stripe.
It tracks:
- Payment amount
- Currency
- Payment status
- Payment method
- Authentication steps
Why Multiply Amount by 100?
Stripe expects amounts in cents.
| Price | Stripe Amount |
|---|---|
| $10 | 1000 |
| $399 | 39900 |
What is Metadata?
Metadata allows us to attach extra information to payments.
Example:
metadata: {
  packageTier: pkgTier
}
This becomes very useful later inside webhooks.
What Does automatic_payment_methods Do?
When enabled:
automatic_payment_methods: {
  enabled: true
}
Stripe automatically shows compatible payment methods.
This is the easiest and recommended approach.
Stripe Webhooks
Now the checkout works.
But we still need a secure way to confirm payments.
This is where webhooks come in.
What Are Stripe Webhooks?
Stripe webhooks are server endpoints that Stripe calls automatically whenever events happen.
Examples:
- Payment succeeded
- Payment failed
- Subscription renewed
Webhooks are extremely important because:
Never trust frontend payment success alone.
Always verify payments on the server.
Create Webhook Route
Create:
src/app/api/webhook/route.ts
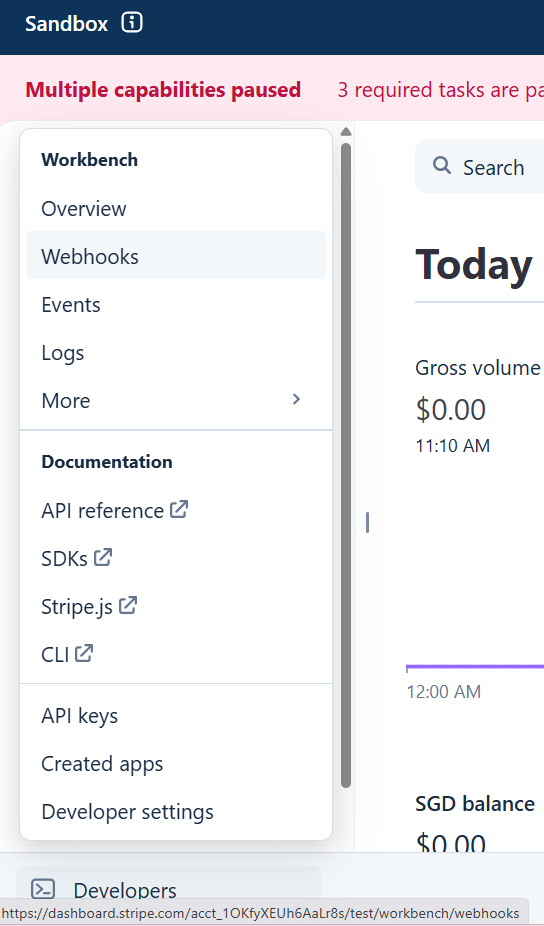
Configure Webhook in Stripe Dashboard
From Stripe Dashboard:
Developers → Webhooks → Add Destination
Select Events
Choose:
payment_intent.succeededpayment_intent.payment_failed
Add Webhook URL
Example:
https://yourdomain.com/api/webhook
Localhost Webhook Problem
Stripe cannot access localhost directly.
For local development, use:
- ngrok
- Stripe CLI
to expose your localhost server publicly. For more info please check:
Add Webhook Secret
Copy the signing secret.
Add to .env.local:
STRIPE_WEBHOOK_SECRET=whsec_xxx
Create Webhook Route Logic
export async function POST(req: Request) {
    try {
        const payload = await req.text();
        const sig = (await headers()).get('stripe-signature')!;
        let event;
        try {
            event = stripe.webhooks.constructEvent(payload, sig, endpointSecret);
        } catch (err) {
            const errorMessage = err instanceof Error ? err.message : 'Unknown error';
            return NextResponse.json(
                { message: `Webhook Error: ${errorMessage}` },
                { status: 400 }
            );
        }
        switch (event.type) {
            case "payment_intent.succeeded": {
                const paymentIntent = event.data.object as Stripe.PaymentIntent;

                if (paymentIntent.status !== 'succeeded') {
                    return NextResponse.json(
                        { message: 'Payment not completed' },
                        { status: 200 }
                    );
                }

                const pkgTier = paymentIntent.metadata?.packageTier;
                console.log("pkgTier", pkgTier);
                console.log("Payment success", paymentIntent.id);

                // Update database
                // Mark order paid
                // Send email
                // Trigger fulfillment

                break;
            }

            case "payment_intent.payment_failed": {
                console.log("Payment failed");
                break;
            }
        }

        return NextResponse.json({ message: 'Received' }, { status: 200 });

    } catch (err) {
        const error = err instanceof Error ? err.message : 'Something went wrong';
        console.error('error', error);

        return NextResponse.json(
            { error },
            { status: 500 }
        );
    }
}
Understanding the Webhook
Why Use req.text()?
Stripe requires the raw request body for signature verification.
In App Router:
await req.text()
works correctly without additional body parser configuration.
What Does constructEvent Do?
stripe.webhooks.constructEvent()
This verifies that the webhook request actually came from Stripe.
Without this verification, anyone could fake webhook requests.
Important Production Tip
Stripe may send the same webhook event multiple times.
Always:
- Store Stripe event IDs
- Ignore duplicate events
This prevents duplicate orders or emails.
Why Webhooks Matter
Your webhook is the safest place to:
- Mark orders as paid
- Save payment records
- Send confirmation emails
- Start product fulfillment
Never trust only frontend success pages.
Why Stripe expects 200
Notice in each return statement status is mostly 200.
When Stripe sends a webhook event, it waits for your server response.
200–299 → Stripe marks event as delivered successfully
400–499 → Stripe assumes your request is invalid
500+ → Stripe assumes your server failed
If Stripe does NOT get a 2xx response, it retries the webhook multiple times automatically.
Testing Stripe Payments
Use these test cards.
Successful Payment
4242 4242 4242 4242
Declined Card
4000 0000 0000 0002
3D Secure
4000 0025 0000 3155
Production Best Practices
| Best Practice | Why It Matters |
|---|---|
| Use Webhooks | Never trust client-side payment success |
| Validate Metadata | Prevent invalid purchases |
| Store Event IDs | Avoid duplicate processing |
| Use HTTPS | Required for secure payments |
| Keep Secret Keys Server Side | Prevent security leaks |
Final Thoughts
Stripe Payment Element is one of the best ways to build modern checkout flows according to your website theme in Next.js applications.
You now know how to:
- Create Payment Intents
- Use Stripe Payment Element
- Handle payments
- Use Server Actions
- Verify Stripe webhooks
- Build a production-ready checkout flow
This setup works great for:
- SaaS products
- Digital products
- Agencies
- AI tools
- Membership websites
I hope this guide helps you build your own Stripe integration successfully.
Useful Resources
- React useActionState Docs: https://react.dev/reference/react/useActionState
- Next.js Server Actions Docs: https://nextjs.org/docs/app/getting-started/mutating-data
- Stripe Payment Element Docs: https://docs.stripe.com/payments/payment-element
Continue Learning
If you'd like to learn more about stripe, check out these tutorials: